

7 Cotton Paper Printing Mistakes to Avoid at Home
Last Updated: November 18, 2026
Quick Summary
Cotton paper printing fails most often because the sheet is thicker, softer and more textured than the copier paper a home printer expects, causing smeared ink, misfeeds and jams. Avoid this by using an inkjet with pigment ink, setting media type to matte or fine art, and feeding sheets through a rear or manual path.
- Inkjet printers with pigment ink handle textured cotton sheets better than laser printers.
- Set media type to fine art, matte or thick paper to widen the platen gap.
- Load one sheet at a time and fan the stack to prevent jams.
- A 250 gsm cotton sheet suits everyday cards; 300 gsm and above suits invitations.
- Run a single test sheet on the exact stock before committing to a full run.
Table of Contents
- Why Cotton Paper Printing Fails (and What It Costs You)
- Mistake 1: Choosing the Wrong Printer for Cotton Paper
- Mistake 2: Ignoring Cotton Paper Printer Settings
- Mistake 3: Feeding Sheets the Wrong Way Round
- Mistake 4: Getting GSM and Thickness Wrong for the Project
- Mistake 5: Not Knowing How to Print on Deckle Edge Paper
- Mistake 6: Printing Invitations on Cotton Paper Without a Test Sheet
- Mistake 7: Skipping Colour Management and Drying Time
- Frequently Asked Questions
Why Cotton Paper Printing Fails (and What It Costs You)
Cotton paper printing fails most often because the sheet is thicker, softer and more textured than the copier paper a home printer expects. That mismatch shows up as smeared ink, misfeeds and jammed sheets. This guide covers seven common mistakes, and how to avoid each one before you waste a single sheet.
The good news: cotton paper is not difficult to print on once you understand how it behaves. The bad news is that most failed attempts come down to the same handful of errors, repeated across kitchens and studio desks everywhere.
Cotton paper is a sheet made from cotton fibres rather than wood pulp, prized for its soft texture, strength and archival quality. Those fibres absorb ink differently from wood-pulp paper, which is exactly why your printer needs different treatment. Because cotton fibres take up ink differently, careful settings and handling matter just as much as the paper itself, and Print Brain's quality checklist offers a useful next step for thinking through print quality.
How Cotton Rag Fibres Behave Under Ink
Cotton rag fibres are long, absorbent and slightly irregular. Ink sinks into them rather than sitting on a coated surface, so colours can look softer and edges less razor-sharp than on glossy photo paper. Uncoated cotton sheets need more ink to reach full density, and they need time to dry. Understanding this single fact explains almost every mistake below.
Cotton paper behaves differently from office paper, and these are the faults that show up when it does.
| Problem | Cause | Fix |
|---|---|---|
| Smeared ink | Sheet thicker, softer and more textured than copier paper | Set media type to matte or fine art |
| Misfeeds | Thick stock in a bottom cassette | Use rear or manual feed path |
| Jammed sheets | Curled sheet fed the wrong way | Load one sheet at a time, fan the stack |
| Print head drags | Platen gap too narrow for textured sheet | Increase the platen gap |
| Blank or faint print | Sheet fed face-down when printer expects face-up | Flip the sheet and try again |
| Smudging or offset | Stacking fresh prints too soon | Reduce ink density, increase drying time |
| Poor ink adhesion or rub-off | Sheet too absorbent for the ink load | Lower ink load, use pigment ink |
| Colours too dark or dull | Uncoated cotton prints duller than the screen | Lift shadows, confirm correct ICC profile |
Mistake 1: Choosing the Wrong Printer for Cotton Paper
The wrong printer is the most expensive mistake, because it cannot be fixed with settings. Cotton paper printing demands a printer that can handle thick, textured stock without bending or crushing it.
Inkjet vs Laser: Which Handles Textured Sheets
Inkjet printers win for cotton paper, almost every time. Pigment ink sits on the fibre surface and holds detail on textured sheets, while laser printers fuse toner at high heat and often struggle with thick stock and rough surfaces.
- Inkjet with pigment ink: best for fine art prints, invitations and textured cotton sheets
- Inkjet with dye ink: fine for practice sheets, but can fade and bleed on absorbent fibres
- Laser: usually a poor match for thick cotton paper; heat and stiffness cause jams and poor toner adhesion
Check your printer's maximum paper weight before buying paper. Many home inkjets top out well below the heaviest cotton stocks, so match the sheet to the machine, not the other way round.
Mistake 2: Ignoring Cotton Paper Printer Settings
Default settings assume thin office paper. Cotton paper printing needs the printer told, explicitly, that a thick, textured sheet is going through it, and the settings you change depend on the printer family you own.
Paper Type, Feed Path and Platen Gap
Set the paper type to "fine art," "matte" or "thick paper" in your print dialogue. This tells the printer to increase the platen gap, the distance between the print head and the sheet, so the head does not drag through the textured surface.
Then choose the right feed path. Most printers with a rear or manual feed handle thick stock far better than a bottom cassette, because the sheet travels a flatter, straighter path.
- Set media type to matte or fine art
- Increase print quality to high or best
- Select rear or manual feed where available
- Reduce ink density slightly if colours look muddy
- Set the paper thickness or platen-gap lever to the thick setting if your printer has a physical lever
Printer-Specific Settings to Check
Settings vary by brand, so check your printer's manual for the exact menu names and feed options.
Check your printer's maximum paper weight before buying paper. Many home inkjets top out well below the heaviest cotton stocks, so match the sheet to the machine, not the other way round. Printers vary in the paper weight they can handle reliably. Watch out: exceeding the rated weight can cause the sheet to stall mid-feed and smear ink across the head path.
A Quick Settings Checklist Before You Print
- Confirm the sheet weight is within the printer's rated maximum.
- Select the matte or fine-art media type.
- Choose the rear or manual feed path.
- Set print quality to high.
- Raise the platen gap or set the thickness lever if fitted.
- Load one sheet, square to the guides.
If the first sheet smears or the head drags, stop, raise the platen gap further or reduce ink density, and run a single test sheet before continuing.
Mistake 3: Feeding Sheets the Wrong Way Round
Cotton paper has a printable side, and feeding it face-down when your printer expects face-up (or the reverse) puts ink on the wrong surface. Textured sheets also curl, and a curled sheet fed the wrong way jams almost immediately.
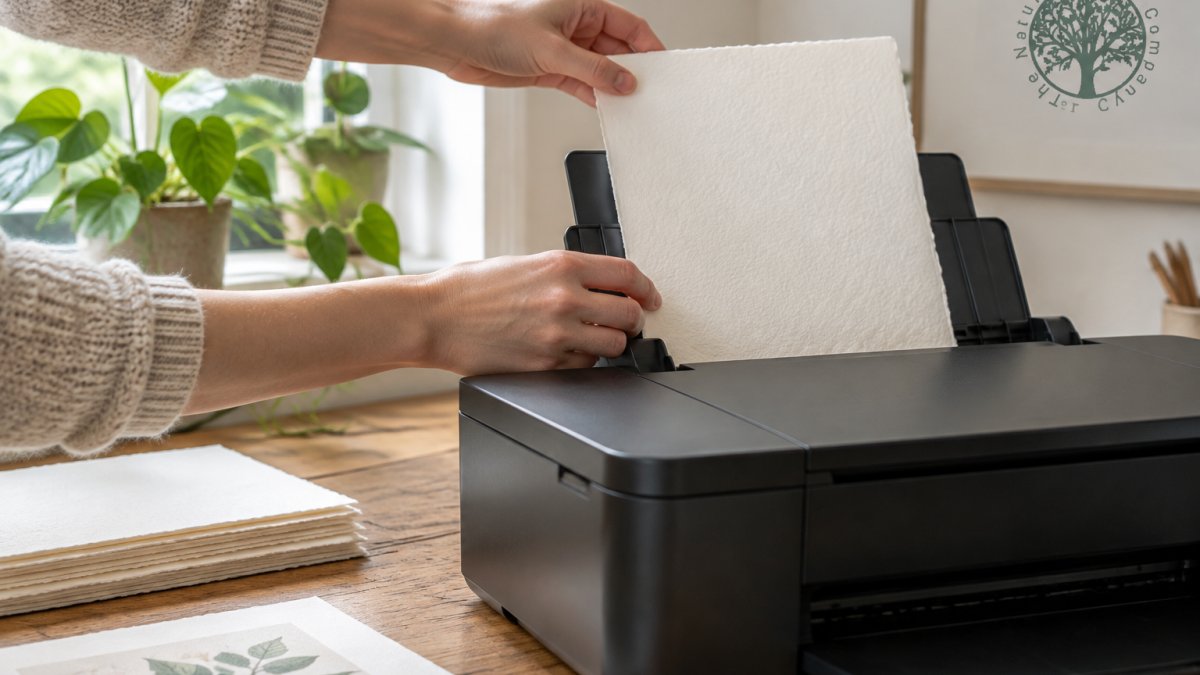
Load one sheet at a time. Fan the stack before loading to break any static, and check your printer manual for which side it prints on.
Mistake 4: Getting GSM and Thickness Wrong for the Project
GSM, or grams per square metre, tells you how heavy a sheet is, and it predicts how well your printer will cope. A 250 gsm cotton sheet suits everyday cards and stationery, while 300 gsm and above gives invitations and art prints a substantial, premium feel.
Heavier is not automatically better. If you are unsure which weight suits your work, our guide on how to choose cotton rag paper for art and print walks through matching weight and thickness to specific projects.
Mistake 5: Not Knowing How to Print on Deckle Edge Paper
Deckle edge paper has a soft, feathered, handmade edge, and that irregular edge is exactly what trips up a printer. The torn-looking edge can catch on feed rollers or skew the sheet as it enters.
The fix is to print first, then trim, or to feed deckle edge sheets through a straight manual path and guide them gently by hand. Never force a deckled sheet; let the printer pull it. For clean finishing after printing, a deckle edge paper and card trimmer gives you a straight cut without crushing the soft edge.
Mistake 6: Printing Invitations on Cotton Paper Without a Test Sheet
Printing invitations on cotton paper without a test print is a mistake that can waste an order. Cotton absorbs ink differently from standard paper, so colours shift, and a design that looked perfect on screen can print too dark or too washed out.
Always run a single test sheet on the exact stock you plan to use. If you are building a matching set, pair your cards with premium textured envelopes for invitations, or start with ready-made cotton rag card and envelope sets to practise your print settings before the real thing.
Mistake 7: Skipping Colour Management and Drying Time
Colour management and drying time are the two finishing details people skip, and both show up in the final result. Your screen glows; cotton paper does not. Colours print duller and darker on uncoated cotton, so soften saturation slightly and proof on the real stock.
Colour Profiles and Proofing on Real Stock
Work in a defined colour space rather than trusting the screen. For most home and studio printing, convert images to Adobe RGB or sRGB and let the printer driver handle the conversion, or use an ICC profile supplied by the paper maker if one is available.
Proof on the exact stock before a full run. Print a small test image with a grey ramp and a few saturated patches, then compare it to the screen under neutral light.
Ink Adhesion, Drying and Curing
Pigment ink on absorbent cotton needs time to cure, often longer than you expect. Stacking fresh prints too soon causes offset and smudging. Leave sheets flat and separated, and allow them time to dry before handling, longer for heavy ink coverage. Watch out: if ink rubs off after drying, the sheet may be too absorbent for the ink load, so reduce ink density, raise print quality, or switch to a paper with a tighter surface.
Troubleshooting Print Quality
- Smudging or offset: reduce ink density, increase drying time, and avoid stacking.
- Poor ink adhesion or rub-off: lower ink load, use pigment ink, and check the media type is set to matte or fine art.
- Uneven colour or banding: clean the print head, run a nozzle check, and proof again on the same stock.
- Colours too dark or dull: lift shadows, add slight saturation, and confirm the correct ICC profile is active.
- Detail looks soft: raise resolution to 300 ppi at print size and avoid over-sharpening, which exaggerates texture.
Run one test sheet through this checklist before committing to a full order, and keep notes on the settings that worked so repeat runs are predictable.
Cotton paper printing rewards patience more than expensive equipment. Get the printer, settings and test sheet right, and the rest follows. At The Natural Paper Company, we stock handmade cotton rag papers and offer a personalised printing service for anyone who would rather leave the technical side to us. Browse our cotton rag range, order a few test sheets, and print with confidence.
Frequently Asked Questions
Can you print on cotton paper with a home printer?
Yes, provided the sheet is within your printer's weight limit. Check your printer manual for its maximum paper weight. Use the rear or straight-through feed rather than a bottom cassette, select a thick or textured paper setting, and print one test sheet before a full run. Thin cotton stock under 200 gsm feeds far more reliably than heavy card.
What printer settings should you use for cotton paper printing?
Set the paper type to matte, textured or fine art rather than plain paper, and choose the heaviest media option your printer offers. Select the rear manual feed, increase the platen gap or head height if your model allows it, and slow the print quality to high or best. Turn off borderless printing on deckled sheets, and reduce ink density slightly if colours look heavy on the first test sheet.
How do you stop cotton paper from jamming in a printer?
Load one sheet at a time through the rear feed and fan the stack before loading to release any curl. Keep sheets flat and store them away from damp, because cotton rag absorbs moisture and warps. Set the platen gap wider so the print head does not drag across the textured surface, and never overfill the tray. If jams persist, the sheet is likely above your printer's rated weight.
Can you print invitations on cotton paper at home?
You can, and a test sheet will tell you quickly whether your printer copes with the weight. Print at the highest quality setting, allow 24 hours for pigment ink to cure before stacking, and avoid folding thick stock without scoring it first. For a multi-order wedding run where consistency matters, a professional printing service removes the risk of colour and texture variation between batches.
