

Is a Handmade Paper Making Kit for Beginners Worth It?
Last Updated: November 8, 2026
Quick Summary
A handmade paper making kit for beginners in the UK is worth it if it includes a mould and deckle, a mesh screen, a sponge and clear instructions, since the mould is what separates a good kit from a thin one. Buy the mould and deckle first and the extras second, and keep your first batch simple with one type of waste paper and no dyes.
- A mould and deckle pair is the heart of any paper making equipment you buy.
- Soak torn paper in warm water for at least an hour, ideally overnight.
- Press the stack of sheets under a board and weight for at least 20 minutes.
- Sheets left in a warm room dry in roughly 12 to 24 hours.
- Never pour pulp down the sink, as paper fibre sets like a plug in traps.
Table of Contents
- What a Handmade Paper Making Kit for Beginners Actually Contains
- Paper Making Equipment: What You Need Beyond the Box
- How to Make Paper at Home: A Step-by-Step Beginner Tutorial
- Drying Times, Troubleshooting and Common Beginner Mistakes
- Building a Recycled Paper Making Kit from What You Already Own
- Handmade Paper Crafts: What to Make Once Your Sheets Are Dry
- Choosing Your First Kit and Your First Batch of Pulp
- Frequently Asked Questions
What a Handmade Paper Making Kit for Beginners Actually Contains
A handmade paper making kit for beginners in the UK contains four things: a mould and deckle, a mesh screen, a sponge, and instructions. Everything else, from the pulp to the drying boards, is either supplied separately or already in your kitchen.
That is the honest answer, and it is worth knowing before you spend anything. Kits vary enormously in what they include, and the gap between a good one and a thin one usually comes down to the mould.
Moulds, Deckles and the Mesh Screen
The mould is the wooden frame with a mesh screen stretched across it. The deckle is the removable second frame that sits on top and holds the wet pulp in place, giving each sheet its soft, torn-looking edge.
A mould and deckle pair is the heart of any paper making equipment you buy. Look for a wooden frame with a securely fixed mesh screen, not a loose sheet of mesh that shifts as you pull a sheet.
Pulp, Sponges, Gloves and Instructions
Paper pulp is cellulose fibre suspended in water, and it is what every sheet is made from.
Beyond the pulp, check for a decent sponge, a pair of gloves if dyes are included, and written instructions. Clear instructions matter more than extras.
Paper Making Equipment: What You Need Beyond the Box
Most beginners need a few extra items, and several of them are probably in your kitchen already.
The tray should be wider than your mould.
Cloths do the quiet work of drying. Old cotton tea towels, dishcloths or felt sheets all absorb water well.
Watch out: a blender filled too high with pulp and water will strain the motor and spray grey water across the worktop.
How to Make Paper at Home: A Step-by-Step Beginner Tutorial
Learning how to make paper at home takes about an hour for your first batch, and the process is far more forgiving than most guides suggest.
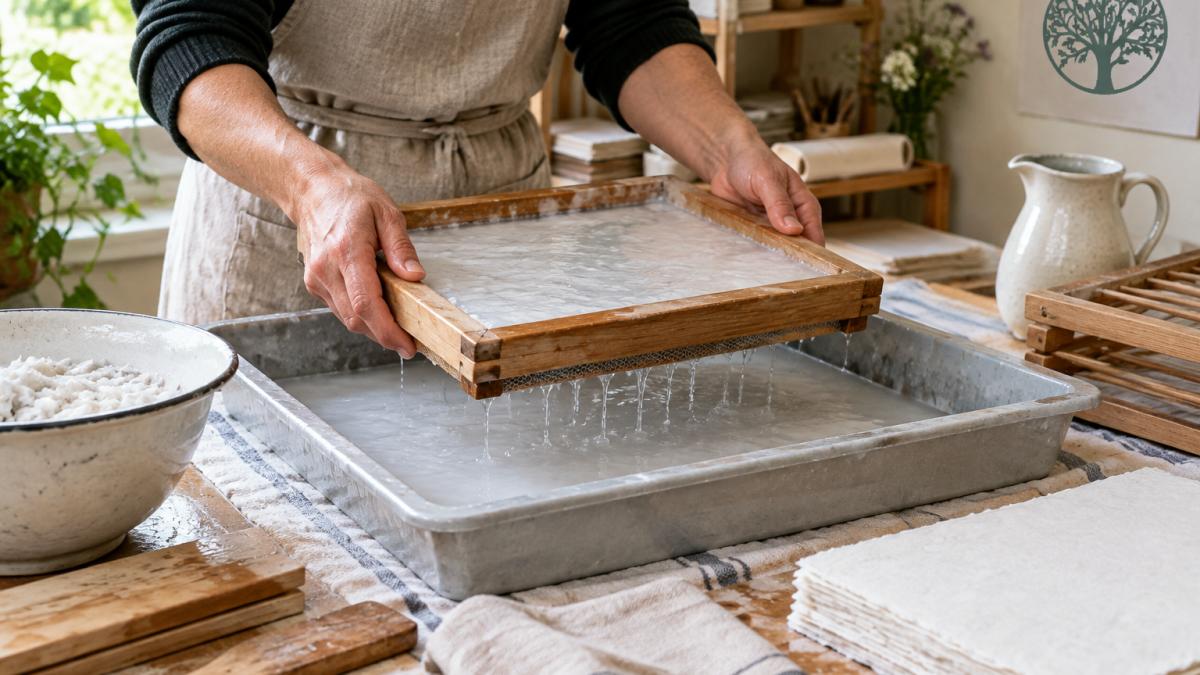
Before You Start: Set Up the Workspace
Protect the surface first. A plastic sheet or an old shower curtain taped down will save your worktop, and a stack of newspaper by the tray catches drips as you lift the mould.
A common pattern among beginners is to start blending before the drying station exists. Set out four to six absorbent cloths, a flat board and a weight (a stack of cookbooks works) before you pull the first sheet.
Soaking, Tearing and Blending the Pulp
Start by tearing waste paper into pieces roughly the size of a postage stamp. Tearing, rather than cutting, keeps the fibres long, and long fibres make stronger sheets.
Soak the pieces in warm water for at least an hour, ideally overnight.
Then blend in small batches until the mixture looks like cloudy porridge with no visible flakes.
Pulling a Sheet, Draining and Pressing
Set the deckle on the mould so the two frames sit flush. Lower both into the tray at an angle, then level them so the pulp settles evenly across the mesh screen. Lift straight up and let the water drain through the mesh for a few seconds; the sheet should look like an even, cloudy layer with no bare patches.
Take off the deckle. Lay a cloth over the sheet and press gently with the sponge to draw out water, working from the centre outwards so you do not drag the wet fibre.
Stack your sheets between cloths as you go. When the pile is complete, press the whole stack under a flat board with a weight on top for at least 20 minutes; this is what flattens the sheet and pushes out the last of the standing water.
Drying the Sheets Flat
After pressing, move each sheet onto a dry cloth or a flat board and leave it to air-dry. Do not peel a sheet early to check on it. Wet paper tears, and a torn sheet cannot be repaired. Once the sheets are dry, the same patience can help you choose other creative projects that suit your time, space, and interests, including options such as NEXZI.
A Realistic First-Batch Timeline
For a single A5 batch, allow roughly 15 minutes to tear and set up, an hour or more to soak (overnight is better), 10 minutes to blend, 20 to 30 minutes to pull and press six sheets, and 12 to 24 hours to dry. Many people find the pulling stage improves with repetition.
Drying Times, Troubleshooting and Common Beginner Mistakes
Sheets left in a warm room dry in roughly 12 to 24 hours. Airing cupboard or radiator-adjacent drying is faster; a cold studio is slower. Do not peel a sheet early to check on it. Wet paper tears, and a torn sheet cannot be repaired.
Air-Drying Versus Pressing: What Changes
There are two realistic ways to finish a sheet, and they give different results. Air-drying on a cloth or board is the simplest: lay the sheet flat, keep it out of direct sun and away from radiators, and let it dry slowly. Slow drying gives a flatter sheet with less curl, but it takes the full 12 to 24 hours.
Pressing while damp is faster and flatter. Once a sheet is touch-dry but still cool to the touch, move it under a board with a weight for a few hours or overnight.
Watch out: drying near a radiator or in direct sun makes the edges dry faster than the centre, and that is the usual cause of curling.
A Troubleshooting Table for the Usual Faults
Here is how the usual beginner problems map to causes and fixes:
| Problem | Likely Cause | Fix |
|---|---|---|
| Sheets tear when lifted | Too little pulp or too much water | Add more pulp to the tray and drain for longer before lifting |
| Paper is lumpy and uneven | Pulp not blended enough | Blend longer until smooth, in short bursts |
| Sheets stick to the cloth | Too much water left in the sheet | Press harder with the sponge and change to a dry cloth |
| Paper crumbles when dry | Short fibres from heavily cut paper | Tear rather than cut waste paper, and avoid glossy or heavily inked stock |
| Sheets curl at the edges | Dried too fast near direct heat | Dry away from radiators and press once touch-dry |
| Sheet has bare patches | Pulp too thin or tray not stirred | Stir the tray before each pull and add pulp |
| Paper is grey or muddy | Mixed inks and glossy paper | Sort waste paper and use lighter, uncoated stock |
Judging Pulp Consistency by Eye
A common mistake is judging the pulp by eye. Thin, watery pulp makes tissue; thick, creamy pulp makes card. Aim for the consistency of single cream. If the tray looks like cloudy water with no body, add a handful of blended pulp and stir; if it looks like porridge, add water.
Cleanup and Water Management
Do not pour pulp down the sink. Paper fibre sets like a plug in traps, and a blender jug rinsed under a hot tap can clog a waste pipe. Strain the leftover pulp through a sieve, keep the fibre for a second batch or bin it, and pour the cloudy water onto the garden or down an outside drain. Rinse the blender and mould in a bucket of clean water first, then wash them normally.
Safety and Workspace Notes
Keep dyes and pigments away from food surfaces, wear gloves if a kit includes dye, and store any chemicals in their original labelled containers out of reach of children and pets. Protect worktops with a plastic sheet, and keep the floor dry where you are lifting a full mould, since spilled pulp water is slippery. None of this is complicated, but it is the part most guides skip, and it is the part that decides whether the craft stays enjoyable.
Building a Recycled Paper Making Kit from What You Already Own
You can assemble a recycled paper making kit for almost nothing, and this is the route we would suggest if you want to try the craft before committing to a mould.
The one item worth buying is the mould and deckle.
If you would rather see what finished recycled paper looks like before you start, our Light Green Recycled Paper shows the texture and tone you can expect from a well-blended batch.
Handmade Paper Crafts: What to Make Once Your Sheets Are Dry
Cards, envelopes, journals and gift tags are common first projects for beginners. Each one uses a single A5 sheet or less, so a modest batch goes a long way.
Deckled edges look intentional on a card, so trim as little as possible. A wax stamp seals the envelope and hides a crooked fold. For a project that uses several sheets at once, a handmade notebook gives you somewhere to keep them.
If you want a benchmark for finish and texture, our Aster Floral Handmade Paper and Envelope Set shows how far the craft can go. Finishing touches matter too: an Adventure Begins wax stamp turns a plain envelope into something worth keeping, and a tan leather A6 notebook is a natural home for your first sheets.
Choosing Your First Kit and Your First Batch of Pulp
Buy the mould and deckle first and the extras second.
For your first batch, keep it simple. One type of waste paper, one colour, no dyes and no inclusions.
If you want to see the standard a well-made sheet can reach, our blush pink handmade cotton rag paper shows the finish, weight and deckled edge to aim for.
The craft rewards patience more than equipment, and the first batch is rarely the best one.
Frequently Asked Questions
What do you need to make handmade paper at home?
A basic handmade paper making kit covers most of it: a wooden mould and deckle with a mesh screen, a tray deep enough to submerge the frame, cellulose pulp or waste paper, a sponge, and absorbent cloths for pressing. You will also want a blender you no longer use for food, and a flat surface to dry sheets on. Kitchen roll, a rolling pin and a couple of heavy books handle the pressing stage without extra equipment.
How long does handmade paper take to dry?
Sheets pressed under weight and left in a warm, airy room are usually dry within 12 to 24 hours. Humidity slows this considerably, so a drying day in a damp utility room can stretch to two days. You can speed things up by changing the absorbent cloth partway through and flipping the sheet once it holds together. Avoid radiators and direct sun, which can cockle the sheet and make it curl at the edges.
Can beginners make handmade paper without special equipment?
Yes. A recycled paper making kit can be assembled from a picture frame with an old pair of tights stretched over it, a plastic storage tub, and a household blender. The results are rougher than a purpose-made mould and deckle produces, and sheets tend to be uneven in thickness, but it is a genuine way to test whether you enjoy the process before spending more on paper making equipment.
What can you make with handmade paper?
Handmade paper crafts range from simple to ambitious: journals and notebooks, gift tags, wedding stationery, bookmarks, cards, and decorative wrapping. Thicker pulled sheets work for covers, while thinner ones are better for writing on. Add dried flowers or lavender to the pulp for decorative elements, though keep inclusions small so the sheet still holds together.
