

DIY Wedding Invitations: 7 Tips for Professional Results
Table of Contents
- Understanding Paper Quality and Weight for DIY Wedding Invitations
- Essential Tools and Equipment You'll Need
- Selecting the Right DIY Wedding Invitation Templates and Design Software
- Crafting Professional Wedding Invitation Wording
- Adding Professional Touches with Wedding Invitation Embellishments
- Common Mistakes to Avoid When Creating DIY Wedding Invitations
- Home Printing vs. Professional Printing: Cost-Per-Unit Breakdown
- Sustainable and Eco-Friendly Materials for Your Wedding Invitations
DIY Wedding Invitations: 7 Tips for Professional Results
Last Updated: July 22, 2026
Creating DIY wedding invitations transforms a traditionally expensive process into a deeply personal project reflecting your style and values. The real challenge isn't design, it's execution. Most DIY attempts fail because couples underestimate technical requirements: printer calibration, paper selection, cutting precision, and assembly consistency. This guide shows you how to avoid these pitfalls and deliver invitations worthy of framing.
Understanding Paper Quality and Weight for DIY Wedding Invitations
Professional-looking invitations start with paper choice. Cardstock is the default for DIY projects because it's affordable and readily available, weighing 65-110 pounds (176-300 GSM). However, premium handmade papers, cotton rag, Lokta, and similar artisanal options, deliver visible texture and character that standard cardstock cannot match. When a guest opens your invitation, they immediately sense the difference.
The tradeoff is cost and technical difficulty. Handmade papers require adjusted printer settings, careful handling during cutting, and realistic expectations about printing consistency.
For wedding invitations, aim for 80-110 pound cardstock (215-300 GSM). Anything below 80 pounds feels flimsy; above 110 pounds requires commercial equipment. Handmade papers typically range from 140-300 GSM. Heavier paper is more forgiving during assembly but requires sharper cutting tools.
| Paper Type | Weight Range | Best For | Printing Difficulty |
|---|---|---|---|
| Standard Cardstock | 80-110 lb (216-300 GSM) | Budget-conscious DIY | Easy |
| Cotton Rag Paper | 100-160 lb (270-432 GSM) | Elegant, textured look | Moderate |
| Lokta Paper | 110-160 lb (300-432 GSM) | Eco-conscious, artisanal | Moderate to Difficult |
| Chipboard | 50-90 lb (135-243 GSM) | Layering, embellishments | Easy |
Heavier paper absorbs ink differently than light cardstock. Your printer may need adjustment, slower feed speed, or manual feed mode. Lighter paper risks ink saturation and bleeding.
Essential Tools and Equipment You'll Need
Professional-level results require more than a printer and scissors. A quality paper trimmer is non-negotiable. Consumer-grade craft scissors produce uneven edges and crush paper fibers, especially on heavier cardstock. A manual paper trimmer with a sharp blade delivers clean, straight cuts. Look for models with at least 12 inches cutting width.
A sharp blade is critical, it dulls quickly, especially on textured papers. Replace blades regularly. For precision work, add a ruler and self-healing cutting mat. A Cricut machine is optional but valuable for custom shapes or decorative elements.
Printer Settings and Resolution Requirements
Set your resolution to at least 300 DPI (dots per inch) for final output. Anything below 200 DPI shows pixelation and color banding. Verify your design's color profile before printing. Your monitor displays color differently than your printer produces it. Print a test sheet and compare it to your digital design. If colors are off, adjust your printer's color settings or your design's color space (RGB vs. CMYK).
Check your printer's manual for the correct setting for cardstock or specialty paper. Some printers have specific settings for "cardstock," "envelope," or "thick paper."
Selecting the Right DIY Wedding Invitation Templates and Design Software
Using Canva for Accessible Design
Canva democratizes design for people without professional training. Its drag-and-drop interface, pre-built templates, and extensive font library make it possible to create polished designs quickly. Start with a wedding invitation template and customize it. Canva's templates are professionally designed, so layout, typography, and spacing are already refined.
The limitation is creative flexibility. If you want something truly unique, you'll hit the platform's boundaries quickly. Canva's free tier has limited options; the paid tier ($13/month or $120/year) unlocks significantly more resources and is worth the investment for a wedding project.
Export your design as a PDF for print. PDFs preserve formatting, fonts, and color profile across different computers and printers.
Typography and Font Pairing Best Practices
Typography is the most visible design element and the one most DIY projects get wrong. For wedding invitations, prioritize readability. Serif fonts feel formal and traditional; sans-serif fonts feel modern and clean. A common approach pairs one serif font for headings with a sans-serif for body text.
Body text should be at least 11 points for readability. RSVP details can drop to 9 points. Add 10-15% extra line spacing to body text and 5-10% extra letter spacing to headings for a polished appearance.
Understanding Bleed Lines and Trim Marks
Bleed lines extend your design beyond where the final cut will be. If your invitation has a colored background extending to the edge, you need a 0.125-inch (1/8-inch) bleed on all sides. This ensures that if your cut is slightly off, you don't end up with a thin white line at the edge.
Trim marks are guides showing where to cut. When you export a PDF, include crop marks or trim marks. These appear as small lines in the corners and edges. Align your paper trimmer with these marks to ensure consistent, accurate cuts.
Crafting Professional Wedding Invitation Wording
Formal Etiquette and Tone
Formal wedding invitations follow a specific structure: host line, request line, event details, and response information. The host line names who is hosting the event. The request line is the core invitation: "request the honour of your presence" (formal) or "invite you to celebrate" (semi-formal).
Formal invitations use "honour" (British spelling) and third-person references. Semi-formal invitations can use first-person and contemporary spelling. The tone you select affects typography, paper choice, and spacing. A formal invitation demands premium paper and careful spacing; a casual invitation can embrace handwriting and playful fonts.
RSVP Card and Save the Date Wording
Keep RSVP text simple: "The favour of your reply is requested by [date]" (formal) or "Please let us know by [date]" (casual). Include clear response instructions: email, phone, or mailed card. If using a mailed RSVP card, include a pre-addressed, stamped envelope.
Save the date cards serve as advance notice, typically sent 6-8 weeks before formal invitations. Keep wording brief: "Save the date: [couple names] are getting married on [date] in [location]. Formal invitation to follow."
Adding Professional Touches with Wedding Invitation Embellishments
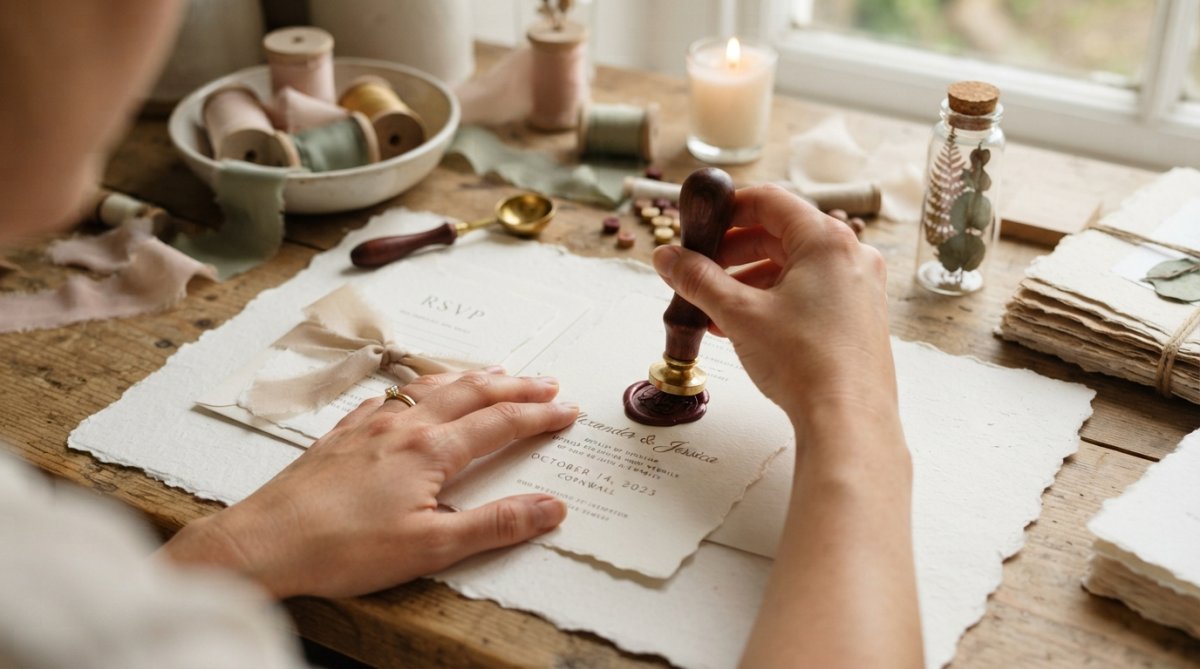
Wax Seals, Leafing, and Finishing Details
Wax seals signal formality, tradition, and intentionality. A wax seal on your invitation envelope immediately communicates that this event is special. Wax seal application requires practice. You'll need sealing wax (available in numerous colors), a seal stamp, and a heat source. Melt wax onto the envelope flap, press the seal into warm wax, and hold steady for 10-15 seconds. Your first few seals will be imperfect, this is normal.
Leafing, applying gold, silver, or copper leaf to paper, adds luxury with minimal effort. Adhesive-backed leaf sheets apply directly to cardstock or handmade paper. The effect is dramatic and catches light beautifully.
Ribbons and twine add texture and visual interest. Silk ribbons feel premium; twine feels rustic. Wrap ribbon around your invitation or tie it into a bow on the envelope.
Ribbons, Envelope Liners, and Assembly
Envelope liners are decorative paper or patterned cardstock that line the inside of your invitation envelope. They're visible when opened and create a moment of delight. Cut decorative paper to slightly smaller than your envelope interior, apply a thin line of glue stick along three edges, and press into place.
Assembly workflow matters. Set up a production line: print invitations, let ink dry, cut to size, add liners, apply embellishments, fold, insert into envelopes, seal. Batch similar tasks together. This workflow is faster and produces more consistent results than completing each invitation fully before moving to the next.
Common Mistakes to Avoid When Creating DIY Wedding Invitations
Print Quality and Resolution Issues
The most common print quality problem is low resolution. Designs that look sharp on screen often appear pixelated when printed because screen resolution (72 DPI) is far lower than print resolution (300 DPI).
Before finalizing your design, verify that all images are at least 300 DPI. If importing images from the internet, they're almost certainly too low resolution. Find higher-resolution versions or avoid full-bleed images. Use solid colors or subtle patterns instead.
Color banding, visible stripes of slightly different colors, indicates insufficient resolution or color profile issues. Increase resolution and verify your color profile matches your printer's expectations.
Cutting Precision and Assembly Problems
Uneven cuts are the second most common issue. When cutting 100 invitations, consistency is critical. Even small variations become obvious when invitations are stacked together.
Use a paper trimmer consistently. Position your paper the same way each time. Mark trim lines clearly. If cutting multiple layers, use a cutting template to ensure alignment.
Misaligned text on two-sided cards is another frequent problem. Most home printers don't guarantee precise paper positioning for reverse-side printing. Test with a single sheet, marking alignment points before the second print. If alignment is off, consider printing single-sided and mounting your design onto pre-cut cardstock instead.
Post-Production Quality Control and Consistency
After printing, cutting, and assembling, inspect each invitation before it goes into an envelope. Check for: ink smudges, paper debris, uneven cuts, misaligned folds, crooked embellishments, and missing elements. Weed out any invitations with visible flaws.
Consistency in assembly is crucial. If 95 invitations have wax seals and 5 don't, the inconsistency is obvious. Either commit to the embellishment for all invitations or none.
Home Printing vs. Professional Printing: Cost-Per-Unit Breakdown
Calculating True DIY Costs
Home printing costs include: paper, ink, embellishments, envelopes, and your time. Cardstock runs $0.50-$1.50 per invitation; premium handmade papers cost $1.50-$4.00 per sheet.
Ink is often overlooked. A typical inkjet cartridge costs $20-$40 and prints approximately 200-400 pages. At 100 invitations, you're spending $5-$20 on ink alone. Embellishments add significant cost: wax seal sets are $15-$30; ribbons, leafing, and envelope liners add another $0.50-$2.00 per invitation.
Your time is the hidden cost. Printing, cutting, assembling, and quality-checking 100 invitations takes 15-30 hours depending on embellishment complexity. If you value your time at $25/hour, that's $375-$750 in labor cost.
Total DIY cost for 100 invitations with embellishments: $200-$500 in materials plus $375-$750 in labor = $575-$1,250 total, or $5.75-$12.50 per invitation.
When to Choose Professional Printing
Professional printing typically costs $2.00-$5.00 per invitation for standard cardstock. For premium papers and embellishments, prices rise to $5.00-$15.00 per invitation. At 100 invitations, professional printing costs $200-$1,500 depending on options.
Professional printing makes sense when: you want truly premium handmade paper (which home printers struggle with), you need embellishments like professional foil stamping or embossing (impossible at home), you're printing more than 150 invitations (DIY labor becomes prohibitive), or you're short on time.
However, professional printing sacrifices personalization and control. If you want something truly custom, a specific paper type, or unique embellishments, DIY is your only option.
Sustainable and Eco-Friendly Materials for Your Wedding Invitations
Handmade papers like Lokta and cotton rag are inherently more sustainable than mass-produced cardstock. They're often made from recycled fibers or agricultural byproducts, use minimal chemical processing, and biodegrade naturally.
Tree-free papers, made from bamboo, hemp, or agricultural waste, are another option. These papers grow quickly and require fewer resources than traditional wood pulp. They're comparable in weight and texture to conventional cardstock and work well in home printers.
Soy-based inks are more environmentally friendly than petroleum-based inks. Many professional printers offer soy ink options, but home printers typically use standard inkjet cartridges.
Minimize waste by calculating your exact invitation count before ordering paper. Reuse scraps for envelope liners, gift tags, or other projects rather than discarding them.
Creating professional DIY wedding invitations is achievable with the right approach, tools, and materials. The challenge is technical execution and consistency at scale. Start with premium handmade papers specifically selected for printability, and you'll find that professional results are within reach.
Frequently Asked Questions
What kind of paper should I use for DIY wedding invitations?
The best paper choice depends on your aesthetic and budget. Cardstock (250+ GSM) offers durability and a professional feel, while premium handmade papers like cotton rag or Lokta provide luxury and texture. For DIY printing at home, ensure your paper is compatible with your printer specifications. Heavier papers (300+ GSM) convey elegance and stand out in a stack, but verify your printer can handle the weight. Consider both visual appeal and practical printability when selecting wedding invitation paper.
How do I make my DIY wedding invitations look professional?
Professional results come from three elements: quality materials, precise execution, and attention to detail. Use premium cardstock or handmade papers, set your printer to high-resolution (300 DPI minimum), and include bleed lines and trim marks in your design. Invest in a quality paper trimmer for clean cuts, and add thoughtful embellishments like wax seals or envelope liners. Proofread wording carefully, test print on scrap paper first, and maintain consistency across all pieces. Post-production quality control, inspecting each invitation before assembly, prevents mistakes.
Is it cheaper to DIY wedding invitations compared to professional printing?
Cost depends on quantity, paper quality, and embellishments. DIY printing at home saves money on small quantities (under 75 invitations) but requires upfront investment in supplies and time. Professional printing becomes more economical for larger quantities due to bulk pricing and efficiency. Calculate your true cost-per-unit by including paper, ink, envelopes, embellishments, and your time. Premium handmade papers increase costs but elevate the final product. For most couples, a hybrid approach, professional printing on premium paper, offers the best balance of quality and value.
What tools do I absolutely need to create professional DIY wedding invitations?
Essential tools include a quality paper trimmer or rotary cutter for precise cuts, a printer capable of handling your chosen cardstock weight, and design software like Canva. A bone folder helps create clean folds, while a ruler ensures alignment. If adding embellishments, you'll need a wax seal kit or ribbon supplies. For assembly, consider a scoring tool to prevent cracking on heavy cardstock. Start with these basics, then add specialized tools (like a Cricut for intricate designs) only if your design complexity requires them. Quality tools prevent frustration and mistakes.